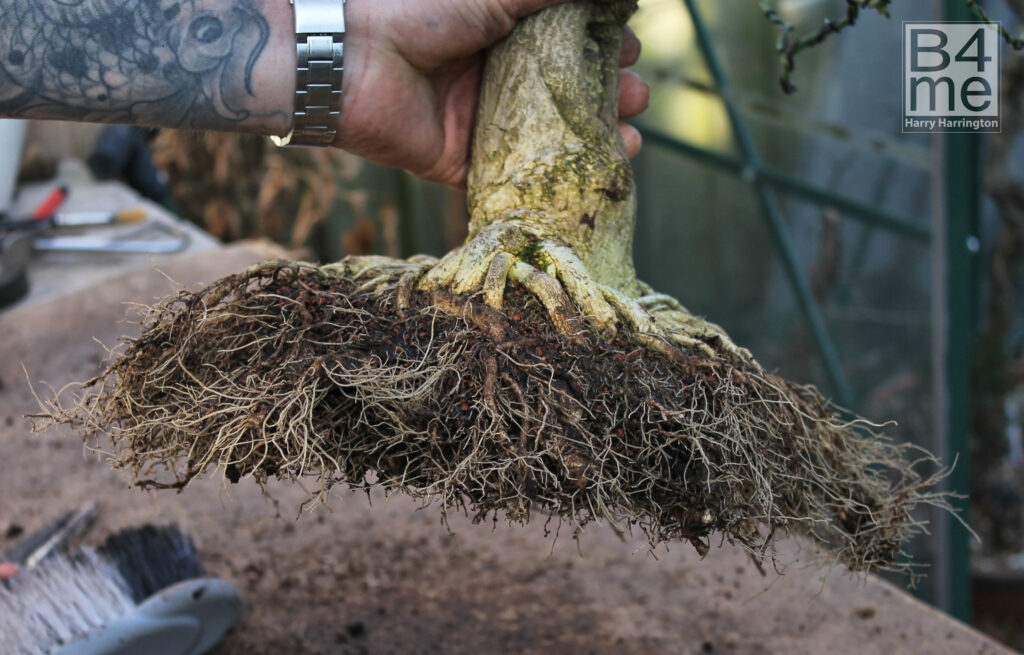
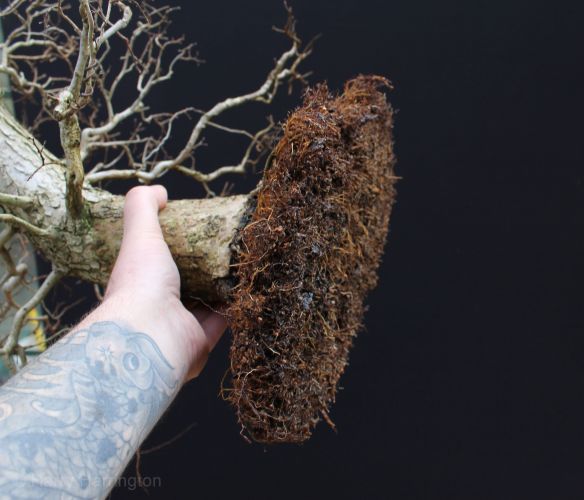
Root-pruning the roots of a Euonymous europeaus/Field Spindle bonsai
Why Repotting is Essential to Bonsai
As plants of all kinds grow, their root systems become larger and more extensive in order that they can supply their ever-expanding canopy of foliage with the necessary quantities of water and nutrients. Trees and shrubs grown in the ground can have root systems that extend beyond the shadow of their own foliage canopy in a search for water and nutrients.
On the other hand, containerised plants are limited by the size of their pot as to how far they can extend. They need to be constantly supplied with food and water on which to survive. Their root systems however, continue to grow in tandem with their leaves and branches above the surface of the soil.
After a period of time that varies between different plants and plant species, the root systems of all pot-grown plants fill their containers, and become ‘pot-bound’. Under these conditions, new fine feeder roots that are so essential to the uptake of water and nutrients in a plant have little room to grow, the soil structure deteriorates and the plant starts to suffer.
With an ordinary pot-plant the solution is to pot the plant into a larger container which allows room for new, fresh compost around the rootball. With a bonsai, the aim of repotting is the same, to allow fresh compost in and around the root system so that it can continue to form fine feeder roots and so that fresh soil can be introduced around the root system. However, with Bonsai, the container, and more specifically, the size of the container is not only part of the design but its size is specially selected to suit the tree. For this reason, Bonsai are root-pruned.
A side effect of root-pruning is that it increases the density of the root ball. From every root that is trimmed, a number of new roots will emerge from the root-tip that was removed. As the rootball is repeatedly pruned over the years, the rootsystem becomes denser and denser. Within a well-developed rootball, dozens of fine feeder roots can occupy the same volume of soil that one unpruned root may ordinarily use. So though the size of the rootball is regularly reduced, the actual volume of root within a certain amount of soil increases, and sufficient to support the canopy of the tree.
Root pruning does not dwarf or stunt the tree in any way . The tree may lose a little vigour for around 6 weeks after rootpruning, as it regenerates its root system (this is more noticeable with evergreen tropicals such as Figs), but after this short period of adjustment, the tree becomes more vigorous than before as new feeder roots are able to develop in the new soil.
The newly pruned roots of an Elm bonsai.
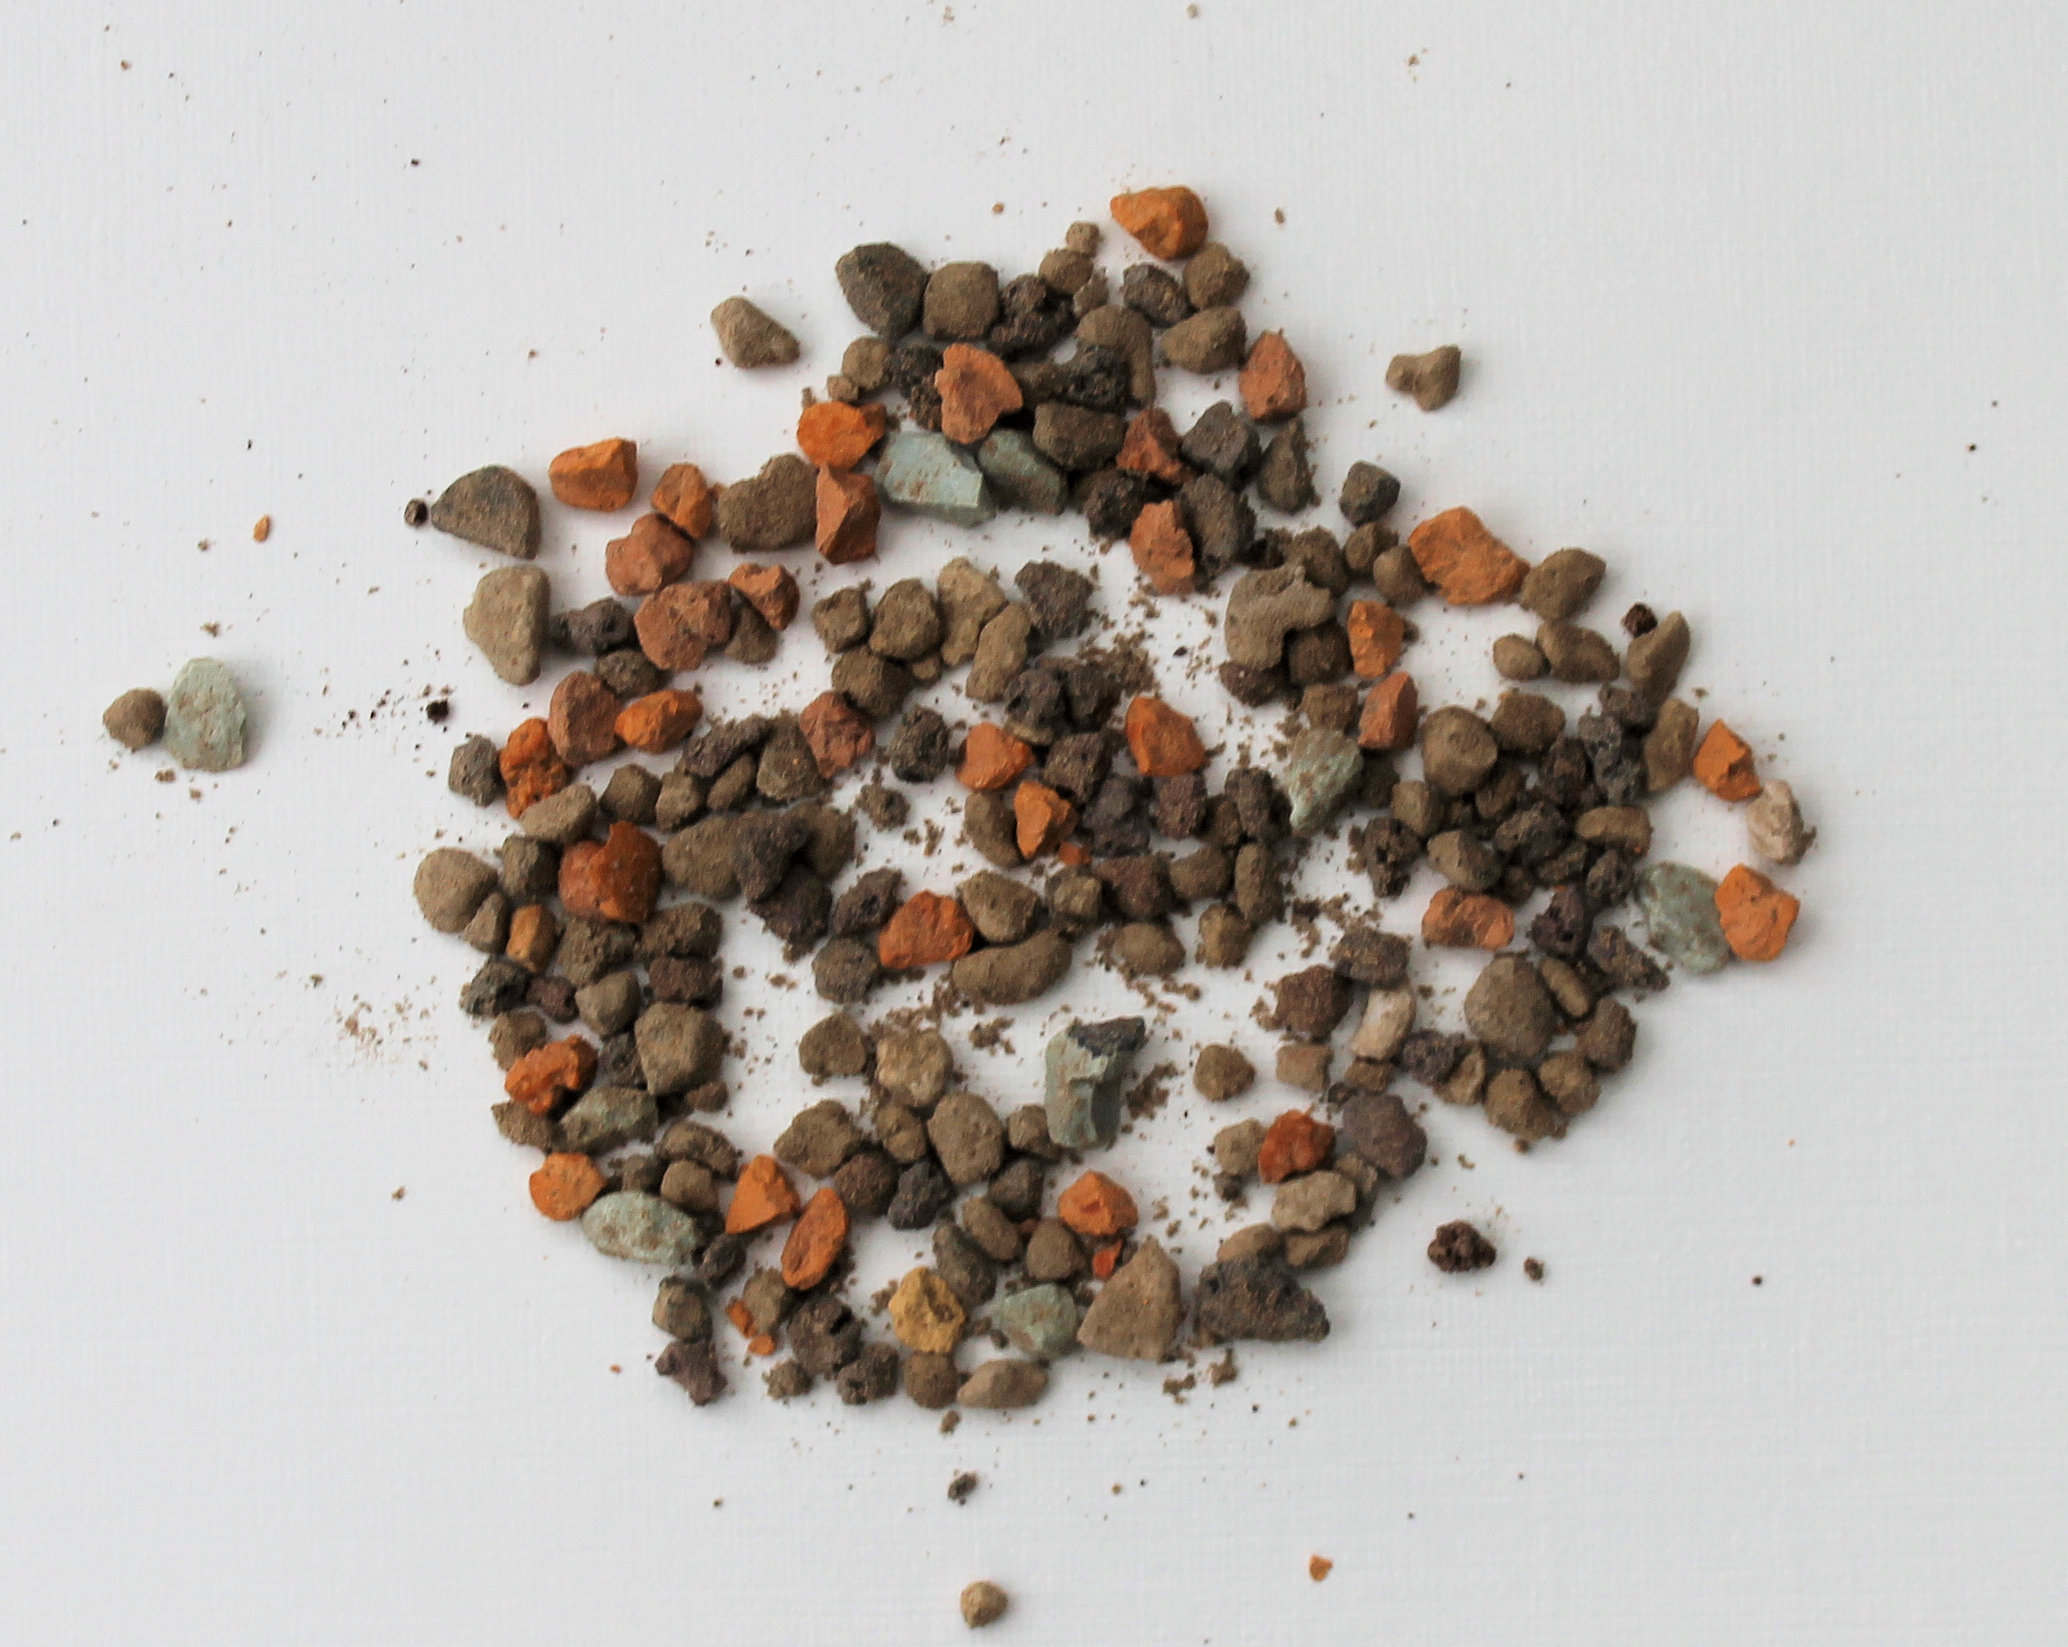
Need to locate some good quality bonsai soil in the UK? Visit the Bonsai4me.com Shop!
How Often Should Bonsai Be Repotted?
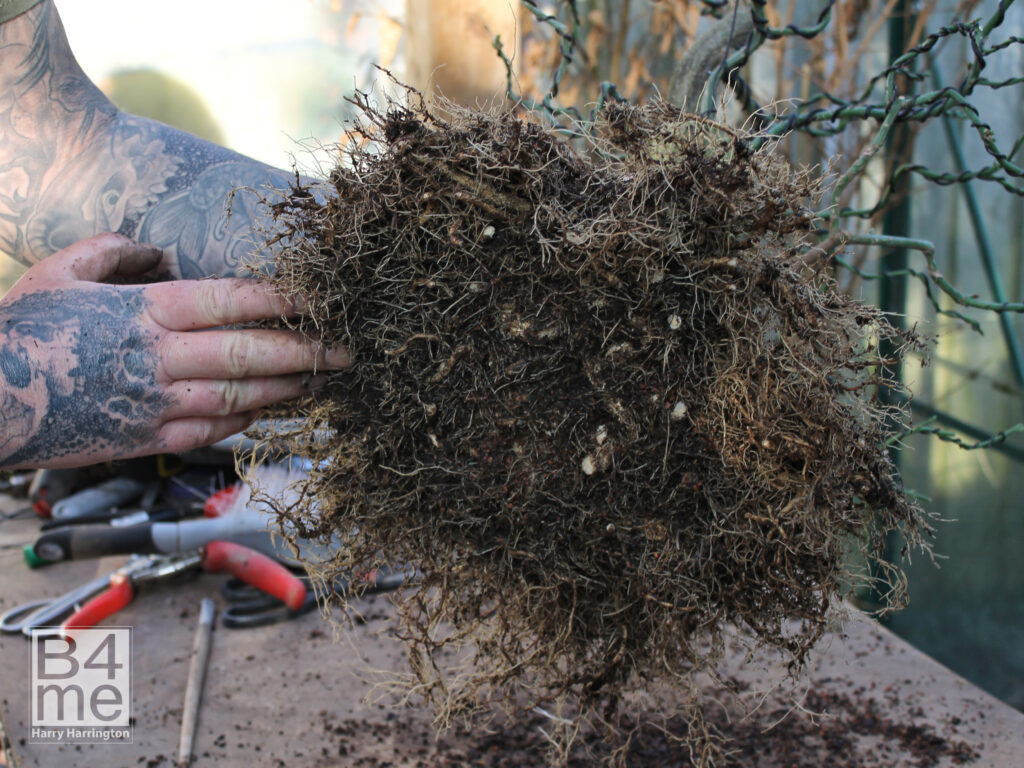
Bonsai need repotting when they become pot bound. A Bonsai is considered to be rootbound when its roots entirely fill the pot and there are long roots circling the rootball or inside of the pot. In some cases, roots will also be seen to be growing out of the drainage holes at the base of the pot.
The time a tree takes to become rootbound varies from one year to five. A number of factors affect the amount of time a tree takes to become rootbound in its pot; different species of tree have different levels of vigour. Fast growing species and individual plants (Figs and Larch for instance) tend to require more frequent repotting and rootpruning. Other factors that contribute to regular root pruning include size of container, development of rootball (a dense established rootball will not require as frequent repotting), and the age of the tree, older trees are not as vigorous and require less frequent repotting.
The rootball should be checked for its condition annually in Spring; gently ease the tree out of its pot and examine the rootball. If the roots of the tree are still contained within the soil, the tree can be returned to the pot and repotting can be left for another year.
When Should A Bonsai Be Repotted?
Bonsai are repotted whilst the tree is dormant, this reduces the stress on the tree as it is not having to supply water and nutrients to its leaves, or in the case of evergreens, the supply of nutrients from the roots is minimal. To repot and rootprune when a tree is supporting a full canopy of leaves and is actively in growth would result in loss of foliage through desiccation, as the roots are unable to supply sufficient water and nutrients to its leaves. Repotting during the growing season is highly stressful to almost all tree species and can often result in death or dramatic loss of vigour.
Therefore, Bonsai require repotting when they are dormant or when there is a minimal requirement for the roots to supply the rest of the tree with nutrients. Another factor that influences the exact timing of repotting a tree is the length of time that injured/trimmed roots will remain exposed to moisture and frosts. The rootsystem will not repair itself fully until the tree starts into growth during the Spring; this means a tree repotted early on in Winter may not repair its roots for a number of months, leaving the root tips open to infection, root rot and frost. By repotting closer to the time that the tree starts back into growth, the less time that the cut roots are left exposed to soil moisture and freezing conditions.
The best time to repot a tree is therefore right at the very end of its dormant period, just as it is about to start back into growth. The tree is still dormant, but, as the tree is about to start back into growth, the repair of trimmed roots is fairly immediate. The exact timing of this varies between tree species, and more importantly, varies according to local climate and individual plants. It is not realistic to expect to find out when to repot a particular species on a certain date as there is so much variation between different climates; as weather conditions subtly change year on year in the same geographical area, it is also not true that a tree is repotted on the same date each year.
Observe each tree to see when it is ready to be repotted. Deciduous species during the Winter, if inspected closely, will be seen to have small leaf buds that are held closely against the branch. As the tree starts to come out of dormancy, these leaf buds will start to extend, ready to open out and reveal their emerging leaves.
Most evergreen species, including coniferous trees will similarly display new buds starting to extend and emerge. It is harder to judge when to repot tropical evergreen species such as Ficus, Serissa and Sageretia that are grown indoors during the Winter in the UK and Northern Europe. Generally, these species will slow their growth rate during the shorter daylight hours of the Winter months, and it is during this semi-dormant period that they can be repotted.
Need to locate some good quality bonsai soil in the UK? Visit the Bonsai4me.com Shop!